

Have you ever found yourself stuck with the coding structure? And wrap up your project with very messy code? Don’t worry you are not alone it has happened to me very often. But not anymore, you are on the right page to learn how to organize your code in Laravel.
In this article, we are going to introduce you with some interesting Laravel topics which will surely help you to become a professional coder.
Common mistakes we make:
It is a pretty well-known fact that Controllers should not have loaded with lots of logic. So, the question arises, where should we move all this logic? This thing is often asked on social media and forums.
Also, this article is not about rules that you have to follow. It is my professional opinion and also used by many well known developers in the community.
Where should we move all controller’s logic?
- Create a service class
A service class is used when you want to write a set of actions in a single file. The idea of service classes is not something built into the framework or documented in the official docs. As a result, different people refer to them differently. At the end of the day, service classes are plain classes responsible for holding the business logic.
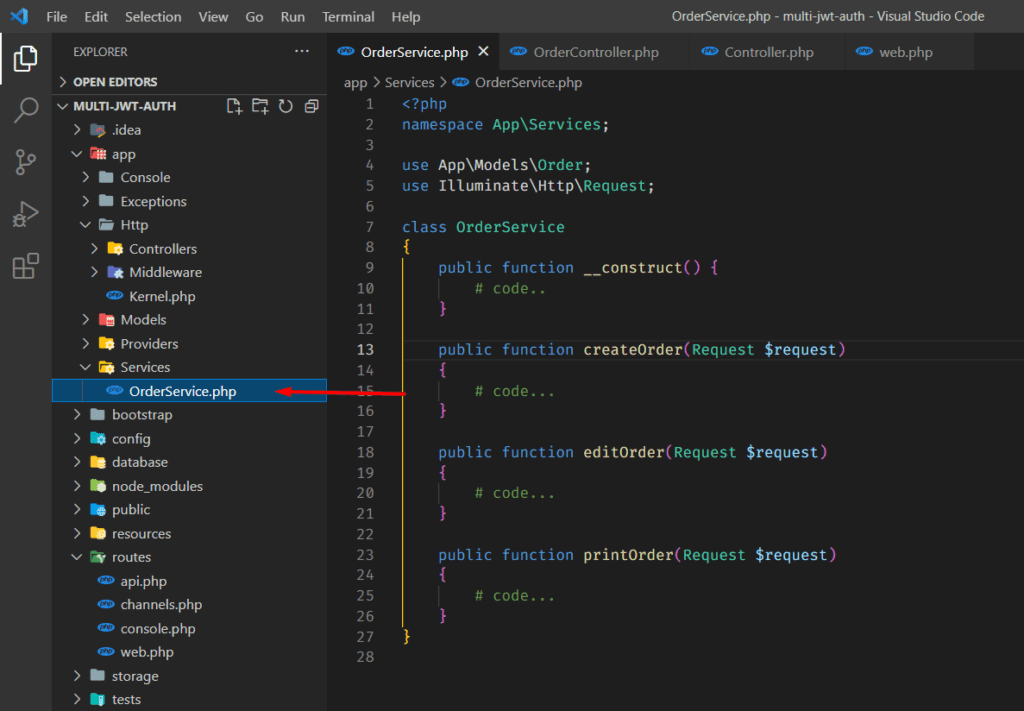
How to create service class?
Create a service folder in app directory, and create a new class file in service folder. Then create a set of actions you want to create in service. Eg: createOrder, editOrder, printOrder in below picture.
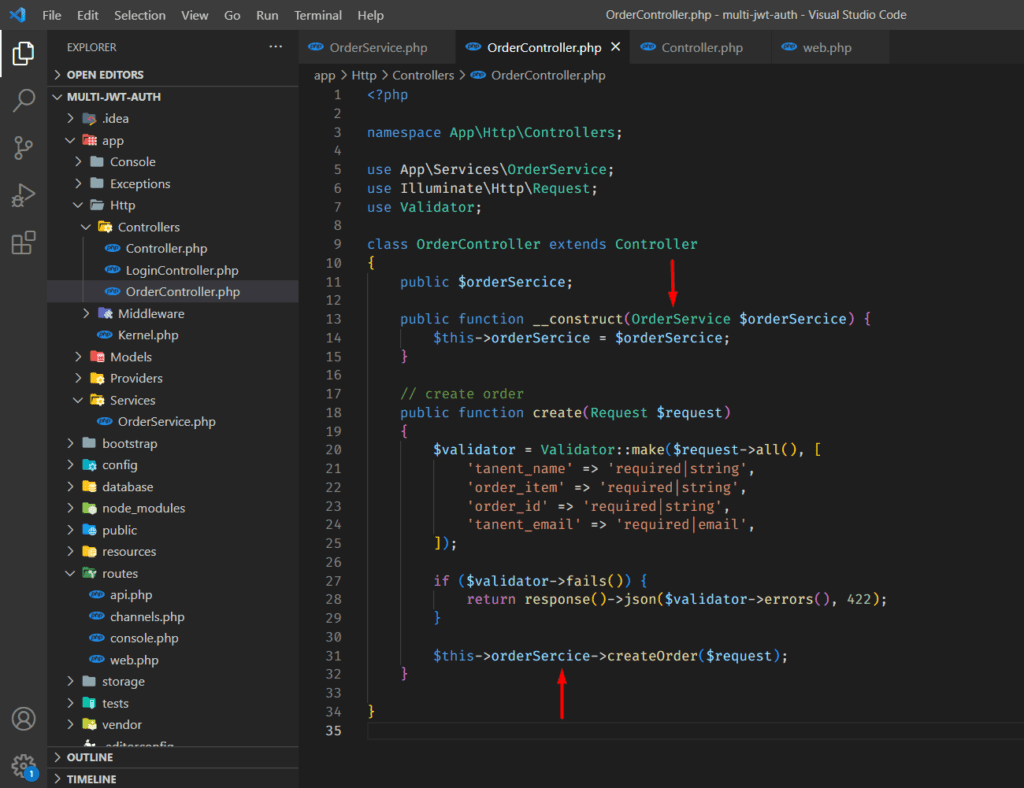
Now you can use Service class in your controller. I have import a service class using dependency injection. Check below image for reference.
- Create an action class
An Action class is a class that takes care of one specific task. Actions are just the same as Service classes but a difference is that Service classes are used to handle multiple numbers of tasks, while Action classes are used to handle a single task. Again, Action classes are not built into the framework and there is no artisan command to create a class. So, you have to create a file in the proper folder with the correct namespace. Generally Action class contain one main method which refer to a start point of Action class (Eg: handle, execute etc..).
How to create action class?
Create Action folder in app directory, and create a new class file in Action folder. Then create a method called handle in Action file. You can write your business logic in handle function.

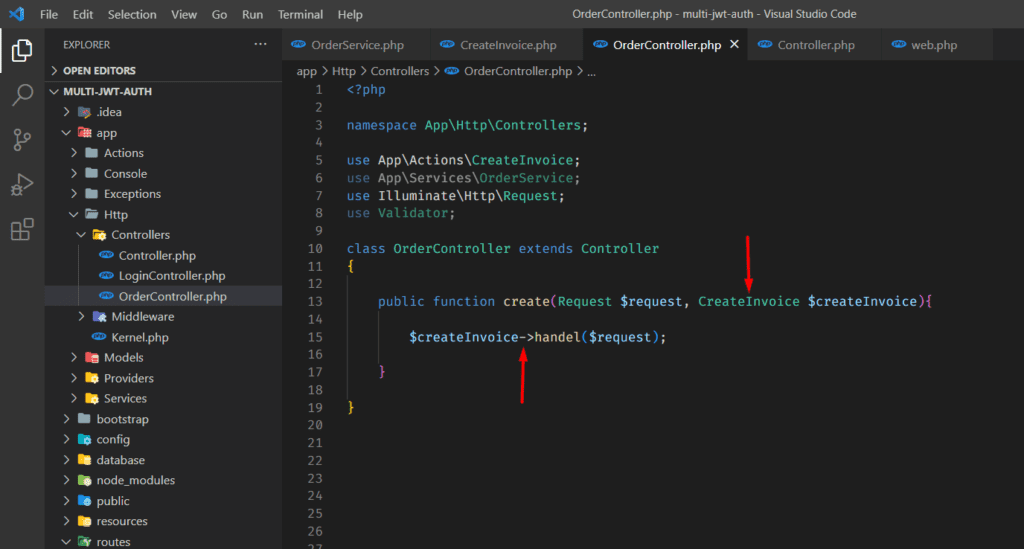
Now you can use Action class in your controller. Check below image for reference.
- Create a Job
While building your Laravel application you may have some tasks such as sending emails and parsing data that may take too long to perform, during a typical web request. Laravel allows to create queued jobs that may be processed in the background. By moving intensive tasks to a queue, your application can respond in speed and provide a better user experience.
You can create a job using the artisan commandphp artisan make:job SendMail
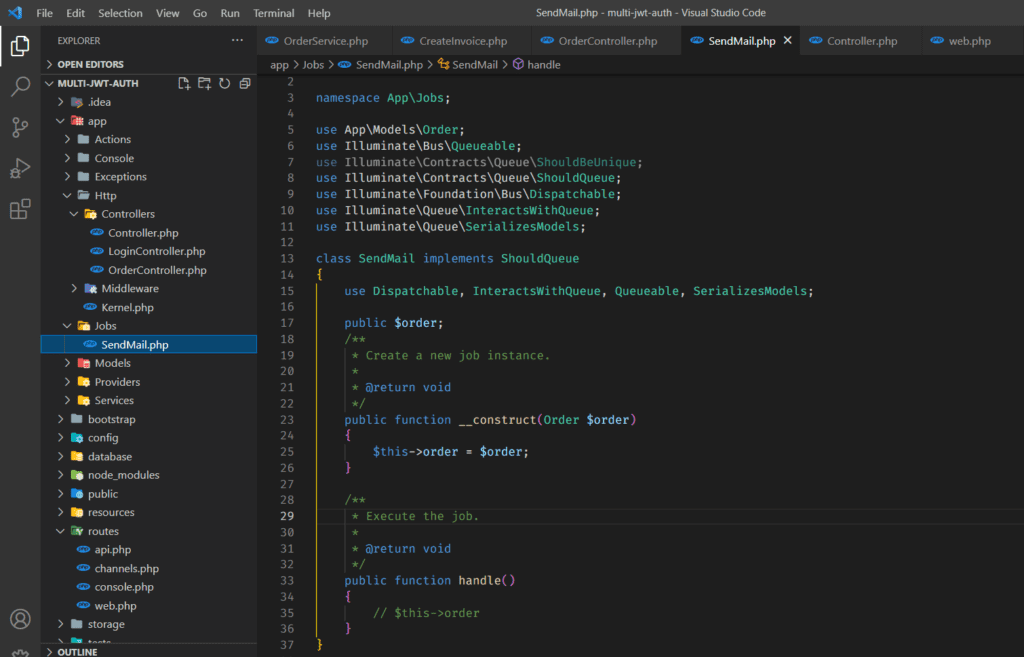
Above command will create a new file inapp/Jobsfolder.
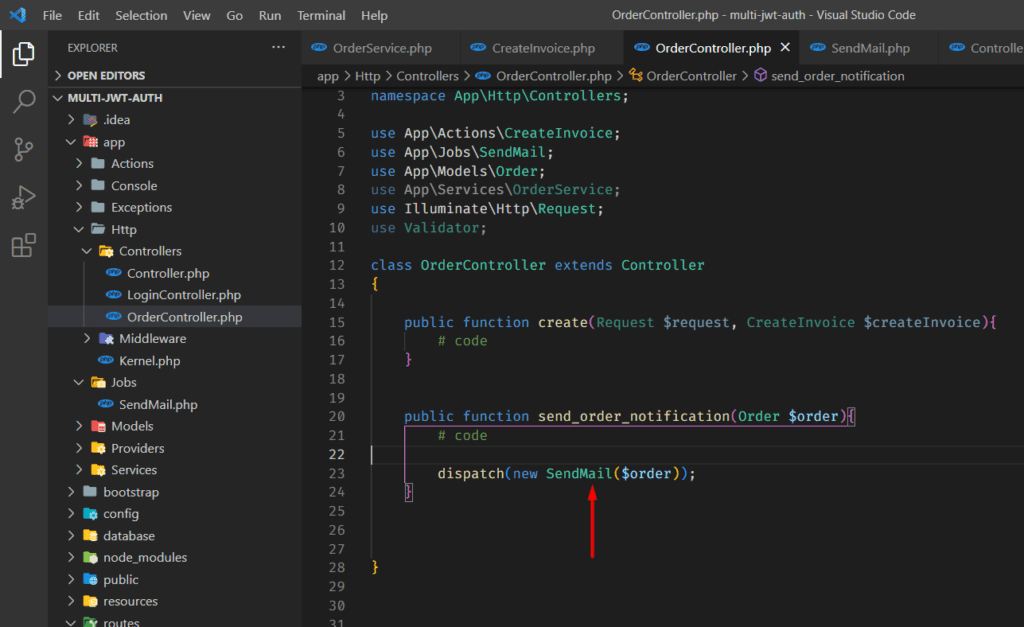
This is how Job looks like. You can write your own business logic inhandlemethod.
You can call a Job using dispatch helper function. See the below image for your reference.
- Use Eloquent Query Scopes
While working on a large scope project on Laravel, you might have many large and complex queries. Laravel Query Scopes allow you to add constraints to your Eloquent query. Laravel provides Global scope and Local scope.
Global scopes allow you to add constraints to all queries for a given model, while Local scopes allow you to define common sets of query constraints that you may easily re-use throughout your application.
For more detail you can check official documentation here.
- Create Helpers files
Helpers, as the name suggests, help you with tasks. Each helper file is simply a collection of functions in a particular category. You can create helper functions that are going to be used throughout the application. By default, Laravel is not providing any command or folder to create a helper function. But developers find their way to create helpers files.
This is how you can create a helper file.
- In your app/Http directory, create a helper.php file and add your functions.
- Then Within composer.json, in the autoload block, add
"files": ["app/Http/helpers.php"]. - Run
composer dump-autoloadcommand.
Now you can use your helper function throughout the application.
Finally, there is no specific rule to manage your code in a specific way. You can manage it in your own way but, this is the preferred way that many developers use in their projects. We will suggest you to implement this practice in your project and try to find a different way to optimize your code based on your project requirement.
Conclusion
Writing clean and maintainable code in Laravel isn’t just a good practice—it’s essential for long-term project success. By using Service classes, Action classes, Jobs, Query Scopes, and Helper functions, you can keep your codebase organized, scalable, and easy to debug. These techniques help shift complex logic away from controllers, making your application more modular and professional.
Remember, there’s no one-size-fits-all rule—but the structure and separation of concerns showcased here are widely adopted by experienced Laravel developers. Start implementing these today and watch your productivity and code quality improve.
🚀 Need expert help organizing or scaling your Laravel application?
Let QalbIT’s Laravel experts support your next project with clean architecture and proven development practices.
👉 Contact us today for a free consultation or to request a code review—we’re here to help you code smarter.
Frequently asked questions
Not at all, At first, you have to work with a lot of files. So, it might be a little tough for beginners to maintain the structure through the end of the project. But once you will habitual with it, It will look a lot easier.
Yes, might be. Again these are not any rules you have to follow, but these are the method that many developers use. There may be another way to optimize your code that you have to find out based on your requirement.